 It starts with idea generation, otherwise known as writing stuff in a notebook. For this illustration, I was given the prompt "too much family" and from there I was free to do whatever. That's a lot of freedom, but without any direction, it's hard to figure out where to start. So I wrote the prompt down, and from there jotted down words and phrases that I associated with it. This is kind of a stream of consciousness thing, so editing takes a back seat. The more I can "blurt" out, the better. This page is a fairly restricted version of this step:
As you can probably see in the picture, I then start circling words that kind of stick or relate more directly to the prompt, and from there I make a sentence from those words. This is my point of departure to begin drawing. How literally I interpret this sentence depends on what I'm working on (or who I'm working for).
Thumbnails come next, and I'm admittedly learning to take more time making these. Doing so helps me come up with a idea of how I am going to arrange certain visual elements and create a compelling composition.

I pick my favorite,then scan and enlarge it a bit. If I wasn't given so much freedom with this assignment, this would be the point where I would email this to see if it gets the yea/nay.

The next step is pretty cool, because I get to use a donated relic of MCA's design department: an old Artograph 1000-J projector, otherwise known as the "Lucy".

I take my selected thumbnail, already enlarged, and blow it up even more on a larger sheet of paper. From here, I get a refined sketch.

Once the pencils are laid out, I move on the the lightbox. The sketch is taped down to keep it from slipping while I'm inking. Same story for the paper that I'm using for the inked drawing.


This is where I get REALLY meticulous. I made a few attempts to record this part of the process. If there is heavy breathing and sighs, I apologize.
This is the finished black and white drawing:

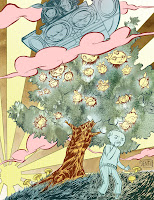
The drawing is scanned in piece by piece (my scanner is too small to capture the entire image). Also scanned are some failed inkjet prints, to use as textures. I then proceed to Photoshop to color the illustration. For the sake of keeping this post fairly condensed, I will save my Photoshop process for a later post. Fast forward through hours of red-eyed labor and we come back to the finished image.


.jpg)


